
Are Unwanted iPhone Subscription Charges Draining Your Wallet? Here’s How to Take Control
Have you ever been surprised by an unexpected charge on your credit card from a subscription you thought you canceled? You’re not alone. Managing subscriptions on your iPhone can be tricky, and forgetting to turn off auto-renewal can lead to recurring charges for services you no longer need or use. In this comprehensive guide, we’ll walk you through the step-by-step process of how to cancel subscriptions and manage auto-renewal on your iPhone, ensuring you’re only paying for what you truly want. This guide is designed to give you the power to manage your digital expenses effectively.
How to Turn Off Auto Renewal on Your iPhone: A Step-by-Step Guide
The iPhone offers a straightforward method for managing your subscriptions directly through your settings. By understanding this process, you can easily avoid unwanted charges and maintain better control over your finances. Let’s delve into the specific steps:
-
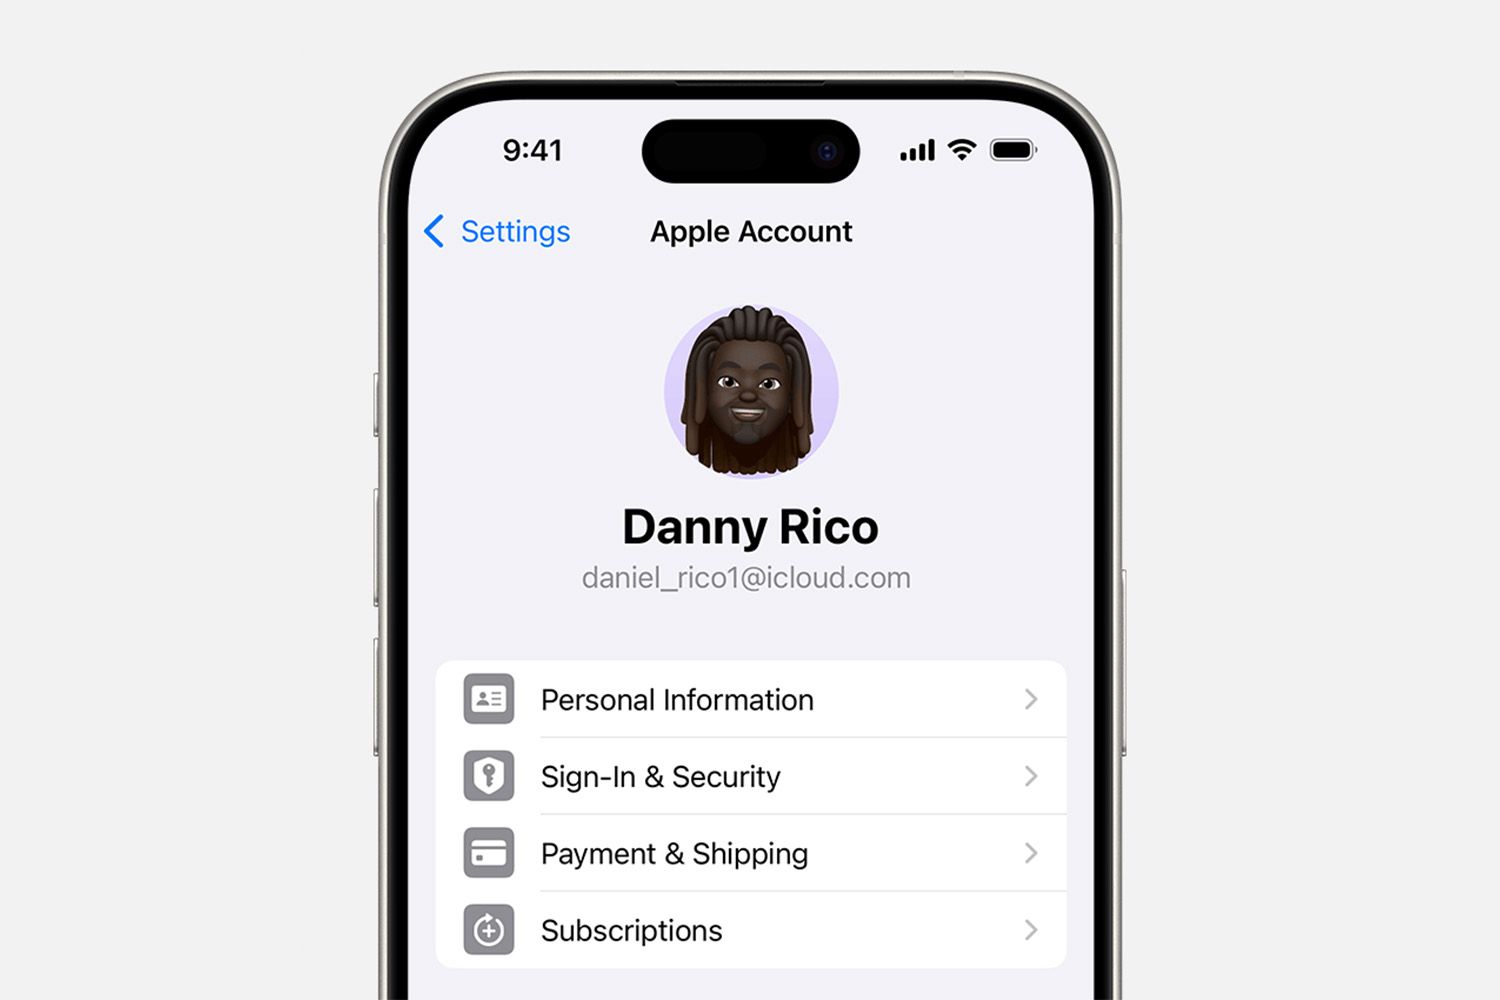
Access Your Apple Account Settings: On your iPhone, navigate to the “Settings” app. Then, tap on your name at the top of the screen. This opens your Apple Account settings. If you have an older version of iOS, you might see “Apple ID” instead of your name.
-
Navigate to Subscriptions: Within your Apple Account settings, tap on “Subscriptions.” This section lists all of your active and inactive subscriptions managed through your Apple ID.
-
Select the Subscription to Cancel: Scroll through the list of active subscriptions until you find the one you want to cancel. Tap on the subscription to access its details. If you have a long list, take your time to ensure you select the correct one.
-
Cancel Subscription or Turn off Auto-Renewal: On the subscription details screen, you should see an option to “Cancel Subscription” or manage auto-renewal. Tap on this option. Depending on the app or service, you might see options to change your subscription level (e.g., downgrading storage). Confirm your cancellation when prompted.
-
Confirmation: After confirming, the subscription will move to the “Inactive” section. You will typically retain access to the subscription benefits until the end of the current billing cycle, even though auto-renewal is now off.
Important Considerations:
- Timing is Key: Apple recommends completing the cancellation process at least 24 hours before the renewal date. While this might seem overly cautious, it’s best practice. Billing cycles can be complex, and allowing ample time helps prevent unexpected charges.
- Access Continues Until End of Cycle: Even after canceling, you’ll usually maintain access to the subscription benefits until the end of the current billing cycle. This is particularly useful if you’ve already paid for the month or year in advance.
- Multiple Subscription Tiers: Some subscriptions offer different tiers of service (e.g., basic, premium). The cancellation process might vary slightly depending on the available options.
Understanding the “People Also Ask” Questions
Many users search for answers to specific questions about managing iPhone subscriptions. Here are some common queries and their answers:
- How do I see all my iPhone subscriptions? As described above, you can view all active and inactive subscriptions within the “Subscriptions” section of your Apple Account settings.
- How do I cancel a free trial on iPhone? The cancellation process is the same for free trials as it is for paid subscriptions. Ensure you cancel before the trial period ends to avoid being charged. Set a reminder in your calendar to cancel a day or two before the due date.
- What happens if I cancel my subscription mid-cycle? You’ll typically retain access to the service until the end of the current billing cycle, even after canceling auto-renewal.
- Why can’t I find my subscription in the Subscriptions list? We will cover this in more detail below, but it might be due to:
- Incorrect Apple ID.
- Direct subscription with the provider.
- Family Sharing restrictions.
How to Turn Automatic Renewal Back On: Resubscribing with Ease
Changing your mind is natural! If you decide you want to reactivate a previously canceled subscription, the process is just as simple:
-
Access the Inactive Subscriptions: Return to the “Subscriptions” section of your Apple Account settings. You’ll see a list of inactive subscriptions.
-
Select the Subscription: Tap on the subscription you want to reactivate.
-
Choose a Renewal Option: You’ll be presented with a payment screen detailing the renewal terms, including the renewal date and price. Select the desired option (if multiple tiers are available).
-
Confirm the Subscription: Complete the process by authenticating with your password, Face ID, or Touch ID. Your subscription will be reactivated, and auto-renewal will be enabled according to the displayed terms.
Troubleshooting: What to Do When You Can’t Find Your Subscription
Sometimes, you might expect to see a subscription listed but can’t find it. Here are the most common reasons and how to troubleshoot them:
1. Check the Subscription Provider
Some services are billed directly by the provider and not through Apple’s App Store. In these cases, you’ll need to manage your subscription directly on the provider’s website or app.
- Example: If you subscribed to a streaming service directly through their website, you’d need to cancel it on their website, not through your iPhone settings.
2. Verify Your Apple ID
It’s easy to accidentally use a different Apple ID than you intended, especially if you have multiple accounts. Double-check that you’re signed in with the correct Apple ID associated with the subscription. Sign out and back in to be sure.
3. Family Sharing Considerations
If you’re part of a Family Sharing plan, keep in mind that the organizer can’t manage subscriptions for other family members. Each member needs to manage their own subscriptions through their individual Apple ID.
Table: Troubleshooting Missing Subscriptions
| Issue | Solution |
|---|---|
| Direct Billing | Check the provider’s website or app for subscription management options. |
| Incorrect Apple ID | Sign out of your current Apple ID and sign in with the correct one. |
| Family Sharing Issues | Each family member must manage their own subscriptions. |
Beyond the Basics: Tips for Effective Subscription Management
Here are a few additional tips to help you manage your iPhone subscriptions even more effectively:
- Regular Subscription Audits: Set a recurring reminder (e.g., monthly) to review your subscriptions and cancel any you no longer need.
- Screenshot Subscription Details: Take a screenshot of the subscription details, including the renewal date and price, for your records.
- Utilize App Store Receipts: Keep an eye on your email for App Store receipts, which provide a record of your subscriptions.
- Contact Apple Support: If you encounter any issues or have questions about a specific subscription, don’t hesitate to contact Apple Support for assistance.
Conclusion: Take Control of Your iPhone Subscriptions
Managing subscriptions on your iPhone is essential for maintaining control over your digital expenses. By following the simple steps outlined in this guide, you can easily turn off auto-renewal, reactivate subscriptions, and troubleshoot any issues you might encounter. Regular subscription audits and a proactive approach will help you avoid unwanted charges and ensure you’re only paying for the services you truly value.
What do you think? Are there any other subscription management tips that you find helpful? Share your thoughts and experiences in the comments below!
Sources & Further Reading:
Original article at www.lifewire.com


